Finishing Touches
When I purchased the car on April 13 2001, I was under the impression that it was only going to take a couple of years to complete the rebuild! I had retired and it would be something to do to keep me occupied in all my spare time. I have since discovered that when you retire you are about to embark on the busiest time of your life, spare time, what spare time?
When I did find time to work on the car I soon discovered that jobs that should only take a couple of hours were taking two day's or more, also, you would take two paces forward and end up going five paces back. Nothing was straight forward, simple jobs that when you took the car apart seven years earlier and thought no need to record how that will have to go back together were starting to haunt me. Things that I had not thought to record as it was obvious how it went together was no longer obvious. Doing an identical car from what I had seemed a good idea at the time but now I realised that I had to strip Flivver down to find out how something went together, hence two hour jobs were doubled and even tripled in time taken.
I have given a couple of talks at "The Restoration Show" at Stoneleigh on the restoration of a "basket case" and I start the talk saying that if you are only thinking of rebuilding a basket case, don't! You need deep pockets and even longer arms to complete any rebuild, I suspect that is why there are so many stripped down cars out there that are in boxes of bits and get put away never to see the light of day again until the owner "passes on" and his wife gets rid of the boxes that are secreted away in various parts of the house.
Enough of these words though, Rosy has progressed well since the last update of my web site and is now nearing completion, I think! The problems I had with the bonnet panels lining up after it had been all sprayed up have now been resolved. David Rider or "Biggles" as he is affectionately called came to wire the car up for me and in the process discovered why the panels were not lining up. This is one of the many reasons why I had become dis-spirited with the car rebuild and left the rebuild to think about how I could resolve the issue. He found that the holes for the headlamp brackets were one inch different from one side to the other, as the whole car had now been finish painted how were we to resolve the problem. He worked out a way of repositioning the radiator grill to "accommodate" the difference. This cheered me up no end and progress was fairly rapid from then on, the wiring loom was fitted and the car wired up. This sounds simple and so it should have been but as David pointed out it was similar to an electrician being invited to completely wire up a brand new house only to find that the house had been decorated and carpets fitted! We had to undo a lot of the car to lay in the cable harness and runs. Having a pit helped as David could route the harness through the chassis without to much trouble.
Car Lighting, Spot Lamp and Horn
After the wiring loom was fitted we then came to fit the lights on, I wanted indicators and high visibility lights, trouble came when I explained what I wanted in the way of extra lighting.
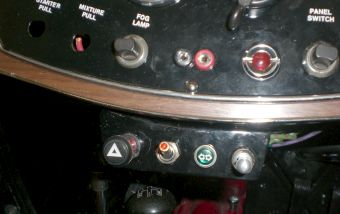 The extra panel and the brackets I made to take the extra lighting. |
The headlamps were another source of problems, if you remember the lights fitted when I purchased the car were off a "TD" so I had to find a couple of original "TA" type headlamps. Here I had been extremely lucky, I had obtained various components to build up a pair of headlamps, but they needed expensive restoration, this is where my luck came in. I had purchased some spares of someone that was in the process of rebuilding a "TA" and he had a pair of headlamps spare all done up ready to fit. We agreed a price and he sent them to me, at about less than half the price I would have to pay to get mine reconditioned, £250 the pair.
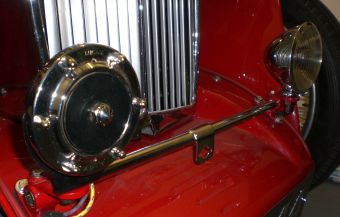 Spot lamp and horn fitted on the badge bar. |
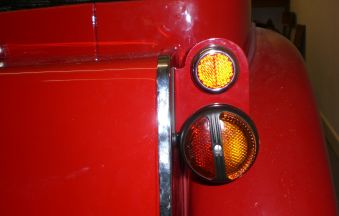 Rear light cluster on brackets fixed to the fuel tank wing panels. |
I had purchased an FT27 spot lamp and an Altette horn as these were missing when I purchased the car, these had been refurbished so it was simply a matter of fitting them. One step forward two paces back, the bar to fit these items on is fitted on with two brackets mounted on the front valence. One of the brackets had a broken bolt in it that clamped the horn or fog lamp in position on the badge bar, the reason for this was that the holes that clamp it were both drilled out of position in relationship to the hole for the badge bar. To overcome this I machined two grooves in the badge bar to enable the clamping screws to fit.
The side lamps were adapted to take the double lamp fitting to enable the indicator lamp to be fitted in to the shell without further modifications. The rear ones were more of a problem, I had to make two brackets to fix them to the fuel tank wing panels. Here are the photographs of the finished item. I had purchased these "mini pork pie" lamps from Stafford Vehicle Components because they looked the part, I think you will agree.
I am now connecting the fuel tank up to the engine, I had not connected it as I knew the tank had to come off to fit the brackets to the 'wing's' on the fuel tank. Whilst the tank wings were off I took the opportunity to route the wiring for the light clusters up between the fuel tank and the cheeks.
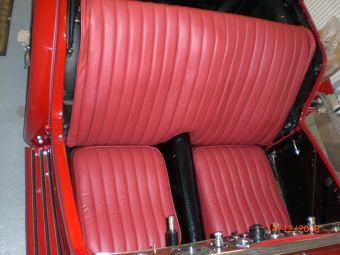
Before the end of 2008 I hope to have the car in a state capable of passing its MOT, then it will be a matter of finishing off the interior and getting a hood and tonneau covers made. I have purchased an interior kit from Moss and it does not appear to be too bad a fit, however when I come to sort out the carpets and fit them both together I will have a better idea then.
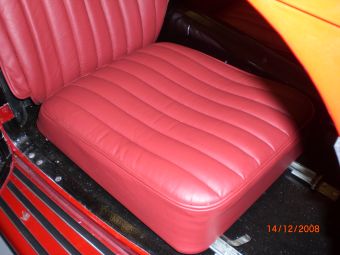
A colleague of mine mentioned that a friend of his could make me the new seats so I entrusted this part of the car interior to him, I had the two squabs for the seats and the backrest made in hide to match the colour of the car and was most impressed with the finished article, especially the price I had to pay.